May 2026

šŸ’”Reflection Probes (Outdoor Photos)

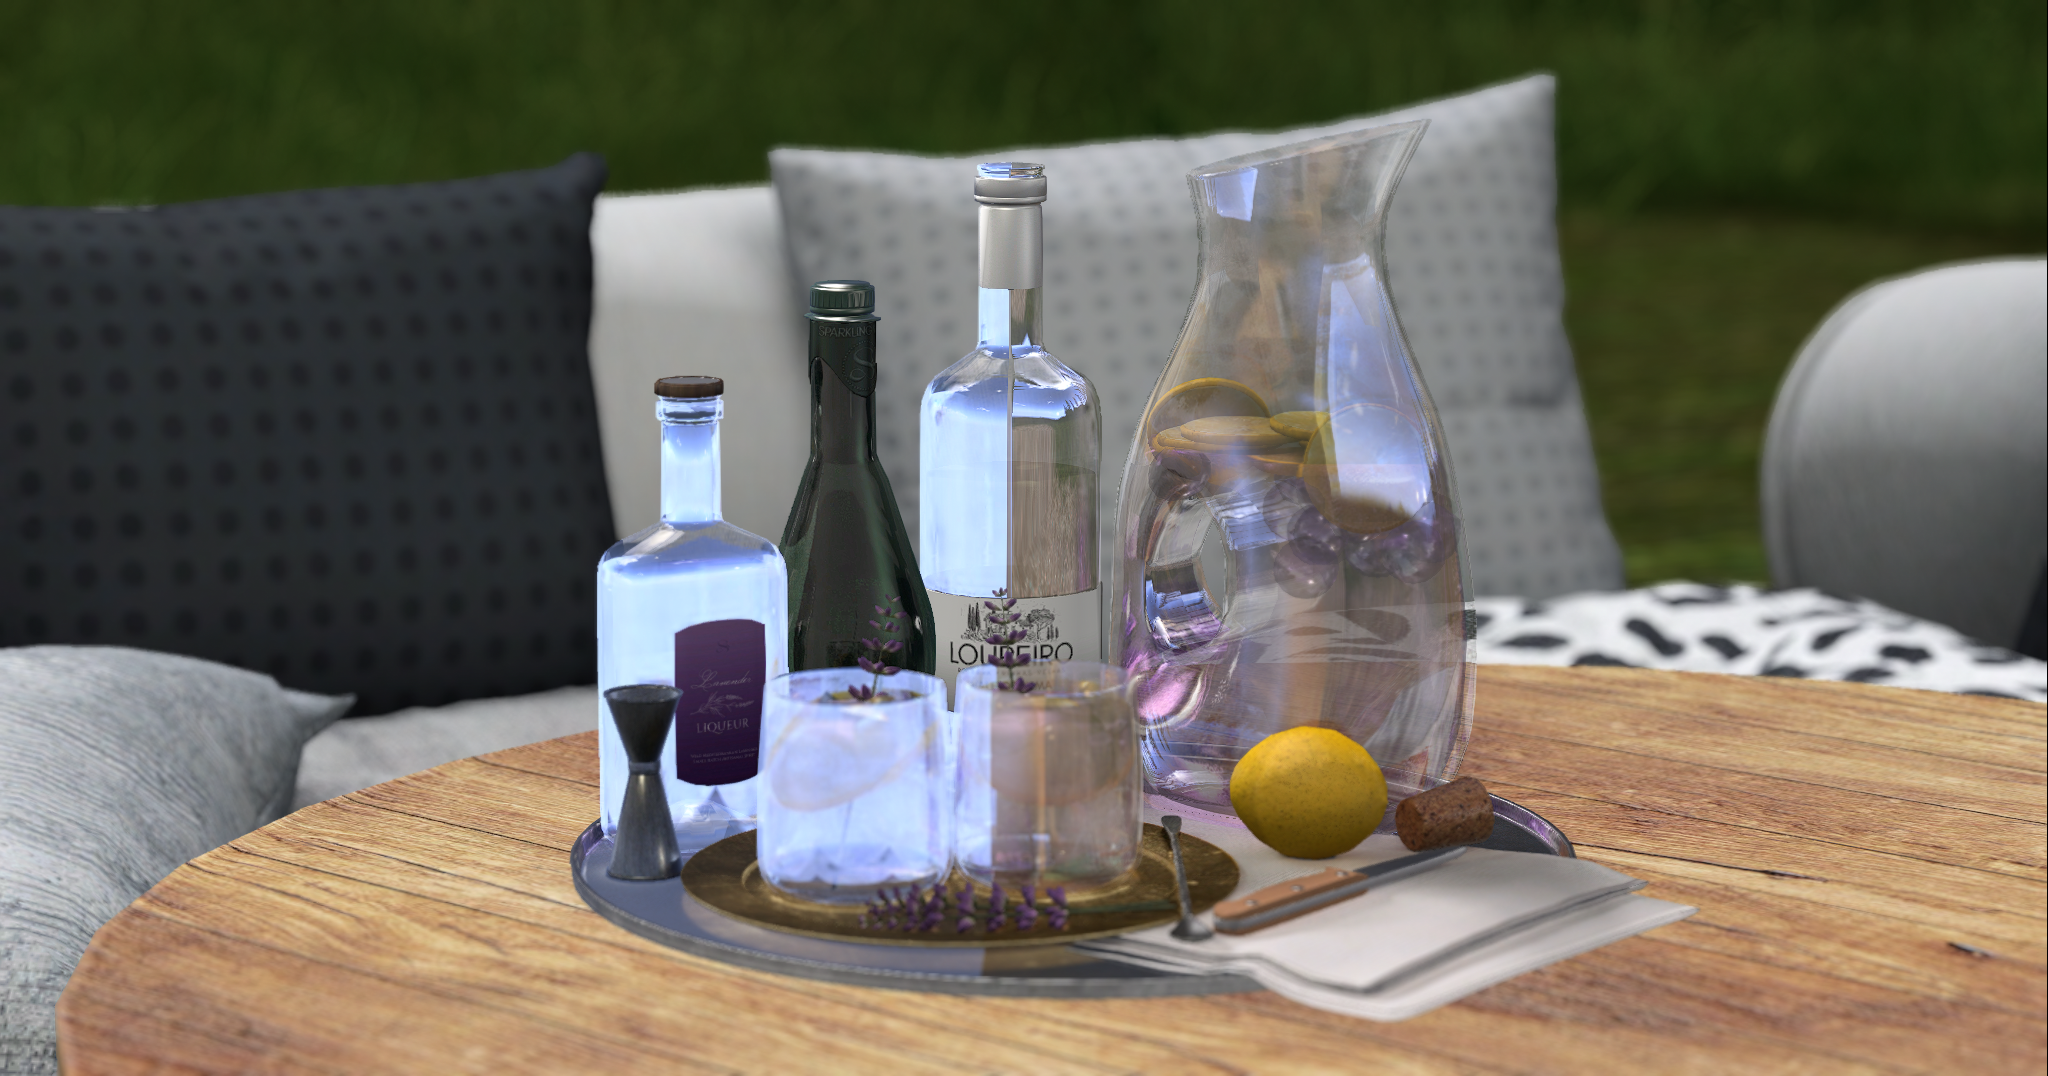
In the world of Second Life PBR, the difference between a generic shine and a real reflection is in the use of Reflection Probes. In the example above, the right half of our Lavender Spritz Tray is covered by a Reflection Probe, while the left half isn’t. The reflection probe fills in the gaps that a generic shine can’t, making a basic material reflect the room around it.

How do we do it?

A Reflective Probe is something you can easily create yourself.

First, rez a cube by right clicking any surface and selecting create. Once your cursor has turned into a magic wand, click wherever you want your new cube to appear.
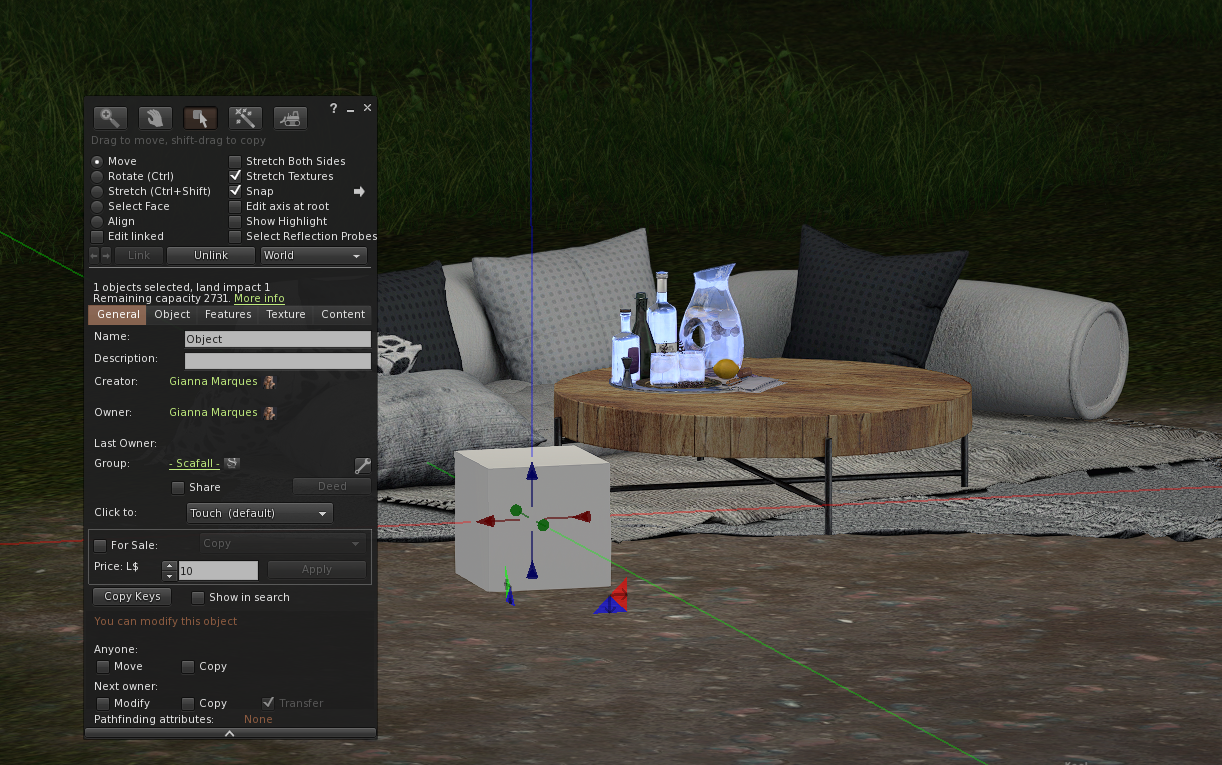
Before defining the size, it’s important to note that:

1. Whatever is inside the probe will be factored into the environment that influences it.
2. Your avatar, or your camera (view) needs to be within the probe for you to see the effect.


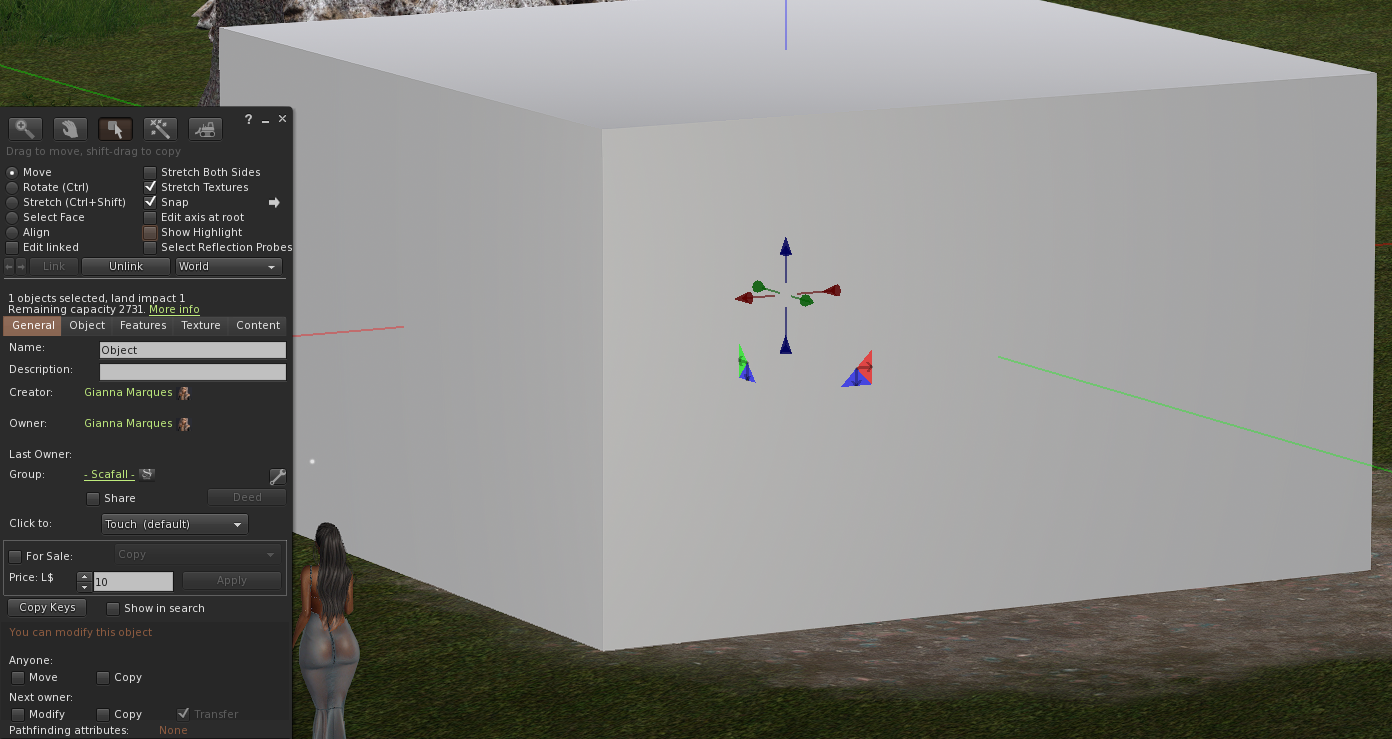
Which means if you want the effect to be seen from a distance, you’ll need to stretch your cube to a size that covers the whole area. In this example, we’re setting up a photo, so I’ll make the probe surround our Sepher furniture, leaving space above and around the sides so the camera has room to move.

To change the size, hold down Ctrl + Shift and drag the stretch handles that appear.
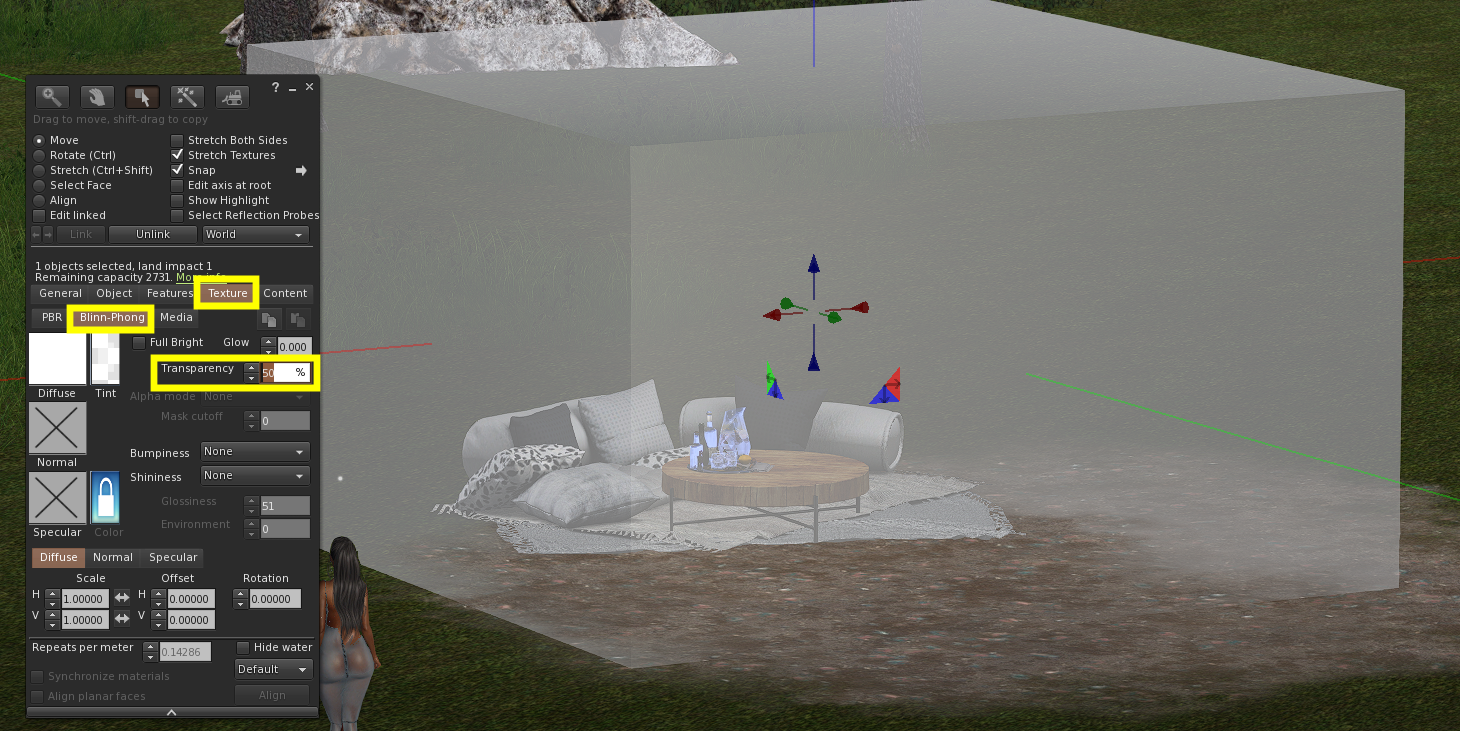
I made the prim transparent just to show its general size in comparison to our Sepher furniture. If you want to do this, Texture > Blinn Phong > Set transparency to 50%.

Once you’re happy with the size, it’s time to convert it to a Reflection Probe. Note: you can still change the size after converting.
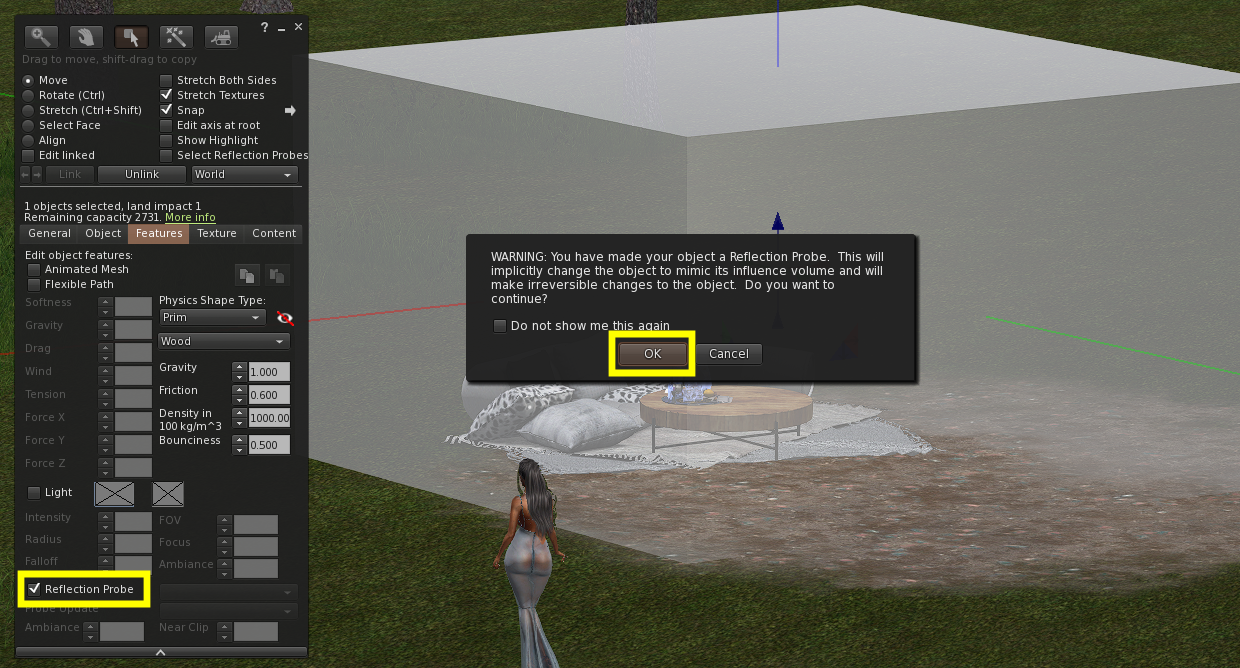
Under the Features tab, tick the box next to Reflection Probe to activate it, then click OK.
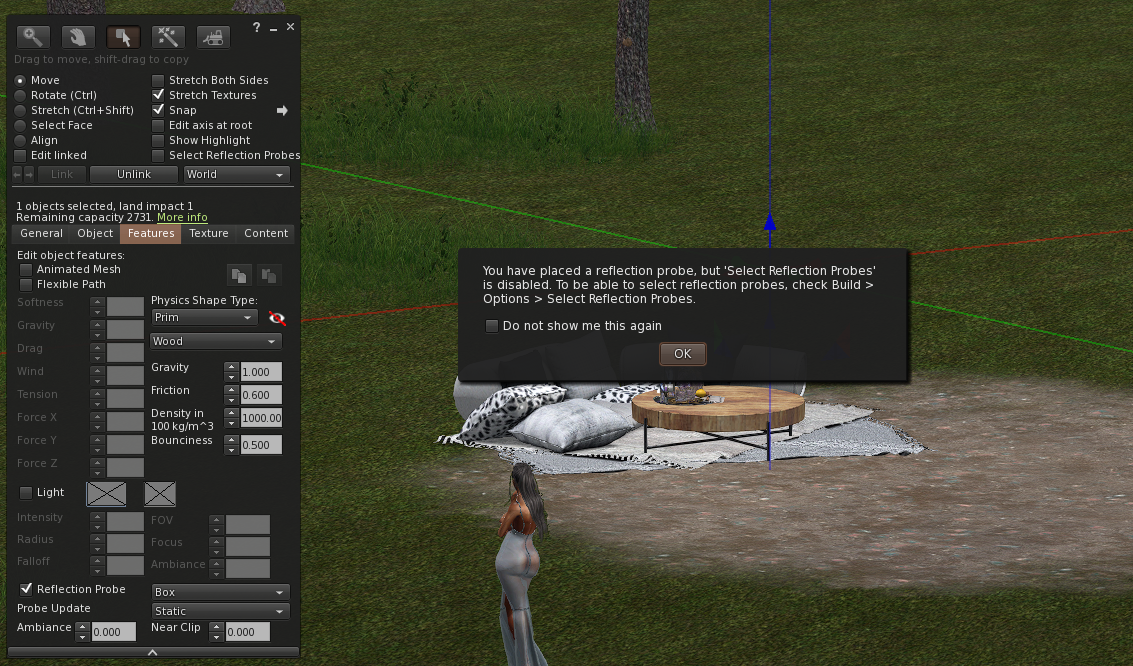
Once you’ve pressed ok, the Reflection Probe will become invisible and phantom (you’ll be able to walk through it). Since these would otherwise act as giant invisible barriers to your environments, the option to select them is off by default. That way you can interact with your furniture without clicking a probe instead.

But if you need to move or resize the probe, or just see where it is, you’ll need to turn selection on.

How To Select Reflection Probes

There are two ways to select Reflection Probes:

  1. Firestorm has an easily accessible Select Reflection Probes option that you can turn on and off in the Right Click > Edit Menu. Turning on Show Highlight makes the invisible probe easier to find by lighting up its edges.
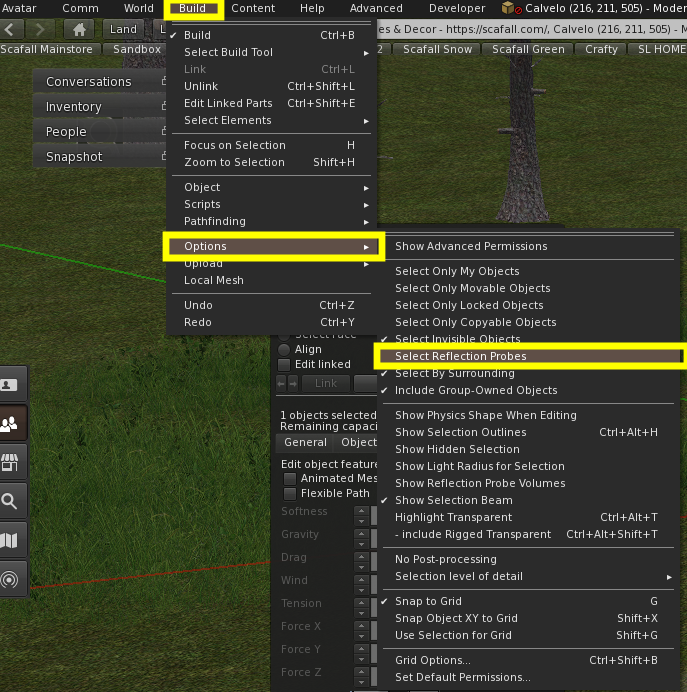
2. Alternatively you can do it via the Build Menu on your top navigation bar.
Build > Options > Select Reflection Probes
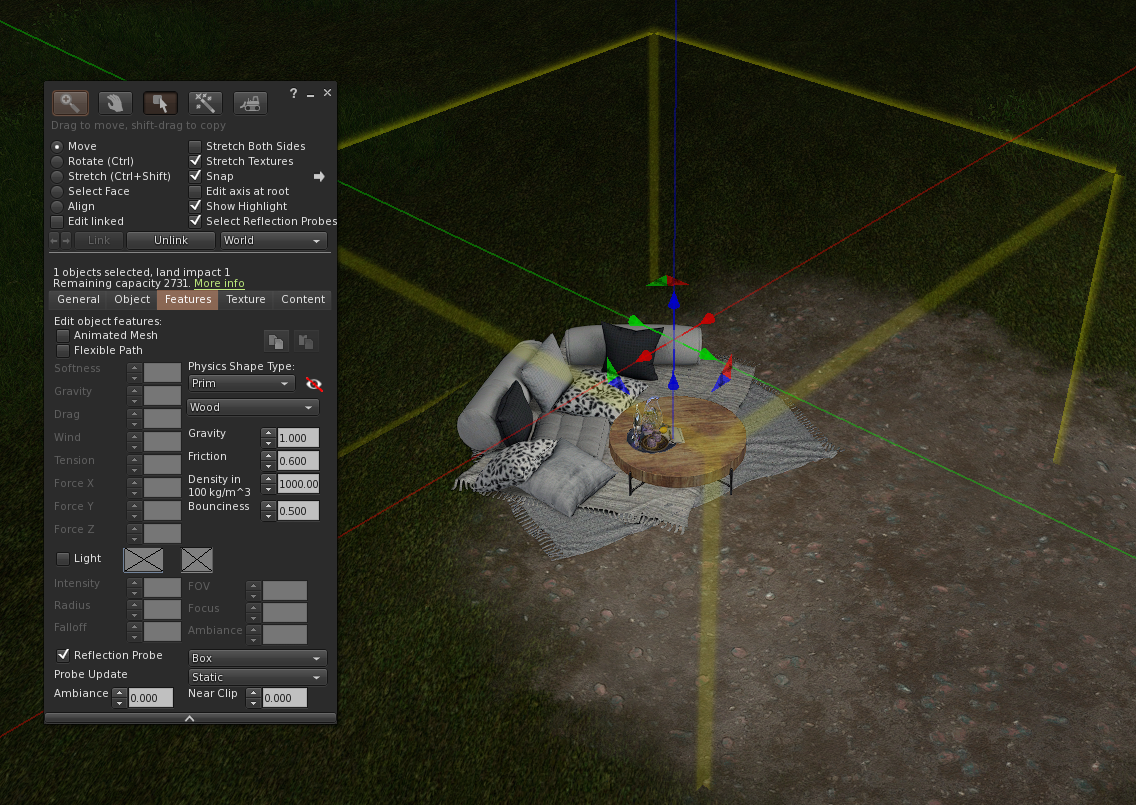
With Show Highlight and Select Reflection Probes on, we can now clearly see the probe. If you’re happy with it’s size and position, you’re all set. But if you want to enhance the scene even further…

Check out our guide on Supporting Lights

♄

Resources

šŸ’”Supporting Lights (Outdoor-Subject Focus)

Reflection probes don’t just handle the shine, they also make your environment more sensitive to the light around it. To really make the scene pop, you might find that adding a few strategic invisible light sources helps fill in the gaps (places that may be too dark, or too flat).

Once you’ve set your Windlight and Sun location for basic shadows and highlights, you can start adding supporting lights using the default prim cubes.

Primary Light (Key Light)

First, create a cube, then go to the Features tab and select the box next to Light. This will turn your cube into a light source. By default it is quite strong, but you can play with the numbers to see what suits the scene.

We’ll treat this cube as the primary light, it’s goal is to do most of the heavy lifting, and create the bones of the lighting for the scene. Discovering where its best to place it is a matter of moving it around, without taking your eye off the subject in your photos. Watch the quick demo here.

Pro tip: keep your camera at the general angle you plan to take your photo from while you move the cube. This lets you see how the light hits the subject in real time.

Secondary Light (Rim Light)

This light will be used to highlight specific details to add depth and dimension to your subject.

To create the Secondary Light, select the Primary Light cube, then hold shift while dragging it along any of the axis handles (red, green or blue). Next move it behind your subject. The best way to find the perfect placement is by moving it around while keeping an eye on the edges of your subject:

Check out this quick clip to see how the secondary light catches the edges. Notice how it affects the ice, cork, plate, and tray, and how it catches the right edges as the light shifts toward the extreme right.

Pro tip: Keep your secondary light subtle. You want to add depth, not wash out the image.

Organising Your Lights

Once you’re happy with the placement of both lights, make sure the Edit Menu is up so you can select them, then hold the shift key and left click both of the cubes. If you want to be sure they’re selected, check Show Highlight. Once they’re selected, click the Link button.

You can now go to the General tab and rename your lights to anything you like. I named them “Light Source.” This makes them easy to find and manage once we make them invisible.

Invisibility

Since we don’t want these cubes showing up in our final photos, we need to make them invisible. To do this, click on the Texture tab and next to the Transparency, type the value 100. This will make them completely disappear.

Now your scene is lit, and you’re ready to snap some photos!

♄

Resources
Scroll to Top